
Replacing Old Timber Decking with Composite Decking Material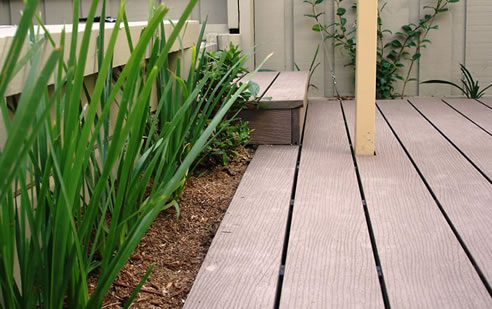 If you have a worn out or rotting deck, or if you're just wanting to free yourself from the hassle of maintaining your timber deck and contributing to environmental damage, it's about time to consider switching to composite wood decking. CleverDeck composite decking is made from 100% recycled wood plastic composite. It is resistant to termites/white ants, with no knot holes or splinters, no cupping or warping and no splitting or twisting, and the best part is: it's fully finished and ready to install. First thing's first, get rid of your old deck. Make sure that your space is thoroughly free from scraps, nails, screws, and other remains from your previous deck installation. Once you have a blank space to work with, you're ready to build your new deck. An important thing to remember is to make sure the construction of the substructure is done carefully, ensuring the joints are level, straight and square, as CleverDeck will follow the level of orientation of the joists. Leave an allowance of 3-4mm fall per metre of decking board in the direction away from the structure so water can run off and reduce the likelihood of creating puddles that can cause water staining when boards are new. If the boards across the deck are not at a 90-degree angle to the joists, they need closer joist spacing. Take note: the closer the joists to each other, the better the deck. Feel free to start from the inner or outer edge of the deck and remember that you may need to trim the decking boards to line up with the joists. It is not recommended trying to pre-determine the width of the last board because it might be too long or too short once everything is laid out.
|
1300 484 308
|


Related News Articles
 Privacy Fencing System by Futurewood
 Structural Aluminium Frame for Decks by
 Screening Board for Backyards by
 Maintenance for Composite Decking by
 Slip-Resistant Walkways for Theme Parks
 Low Maintenance Cladding for Water Park
 Facade Screening for Industrial
 Care Tips for Composite Timber Decking
 Composite Timber for Picnic Tables by
 Three Types of Decking by Futurewood
 Weatherproof Cladding Supplier by
 Composite Timber Fences for Backyards by
 Composite Decking Frame by Futurewood
 Composite Decking Supplier NSW by
 Composite Timber for Outdoor Benches by
 Vertical Screening for Backyard by
 Weatherproof Composite Cladding for
 Maintenance Free Decking by Futurewood
 Timber Alternative Features by
 Aluminium Subframe for Decks by
 |
 |
Home | About/Services | News Lounge | News Archive | Product Archive | Tender News | Testimonials | Conditions of Use | Privacy Policy | Stats
![]()
![]()
![]()
![]()
© SPEC-NET