
Installing Edwardian Tiles from Designer Ceramics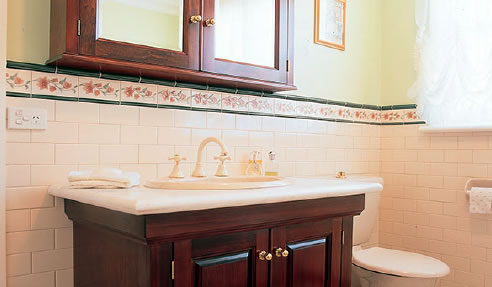 Edwardian Tiles: How To Install Like An Expert Edwardian tiles are an example of the ingenuity of the Edwardian Era - the time in history where the Industrial Revolution changed human civilisation. The growth of industry in manufacturing plus mechanical and technological innovations led to profound creativity and design in both arts and crafts. The Garland design from the Edwardian tiles collection by Designer Ceramics exudes some of the Edwardian elements of femininity - accentuated by light colour and a floral design. Garland Edwardian tiles have an embossed, glossy intricate floral pattern bordered with a twisting cord design. The use of Edwardian wall tiles is an ideal makeover solution for consumers who want to experience the luxury of Edwardian Era. Designer Ceramics' Edwardian wall tiles are chosen by architects and interior designers for restoration work and to enhance a property with classic architectural styling. For do-it-yourself buffs, Designer Ceramics have laid down the basics of installing Edwardian tiles like an expert. Note: Designer Ceramics' Edwardian wall tiles come in a standard size of 8 inches or 198mm. Part 1: Preparing the Wall 1. Ensure that the wall is prepped and good to go. After the old wall dressings and wall items have been removed, like light switch covers, check if the base layer which is the building block is still fit and sound. This is an essential part of installing ceramic tiles, whether done by professionals or by an amateur.
|
Designer Ceramics Australia P/L Profile 03 9471 0230 406 Gilbert Road, West Preston, Vic, 3072
|


Related News Articles
 Designer Border Tiles Melbourne by
 Embossed Tiles & Cappings Melbourne from
 Classic Border Tiles Melbourne from
 Classical Border Tile Supply Melbourne
 Traditional Interior Tile Supply by
 Contemporary Border Tiles Melbourne from
 Ceramic Tiles Melbourne from Designer
 Ceramic Tiles Melbourne from Designer
 Victorian Border Tiles in Modern Design
 Victorian Border Tiles in Modern Design
 Why are Designer Ceramics' French
 Why are Designer Ceramics' French
 Set the Trend with Art Deco Border Wall
 Set the Trend with Art Deco Border Wall
 Creative Concepts with Art Deco Tiles |
 Creative Concepts with Art Deco Tiles |
 Interior Design with Vintage Wall Tiles
 Interior Design with Vintage Wall Tiles
 Keep Up With the Trends: Bathroom Wall
 Keep Up With the Trends: Bathroom Wall
 Designer Ceramics: Ceramic Wall Tiles
 Designer Ceramics: Ceramic Wall Tiles
 Be Your Own Designer with Bespoke
 Be Your Own Designer with Bespoke
 Add a Parisian Flair with French
 Add a Parisian Flair with French
 Authentic Periodic Appeal with Period
 Authentic Periodic Appeal with Period
 Victorian Border Tiles for Bathroom
 Victorian Border Tiles for Bathroom
 French Provincial Tiles: A Touch of
 French Provincial Tiles: A Touch of
 Artistic Interiors with Art Deco Wall
 Artistic Interiors with Art Deco Wall
 |
 |
Home | About/Services | News Lounge | News Archive | Product Archive | Tender News | Testimonials | Conditions of Use | Privacy Policy | Stats
![]()
![]()
![]()
![]()
© SPEC-NET