
Practical External Rendering Advice from JPS Coatings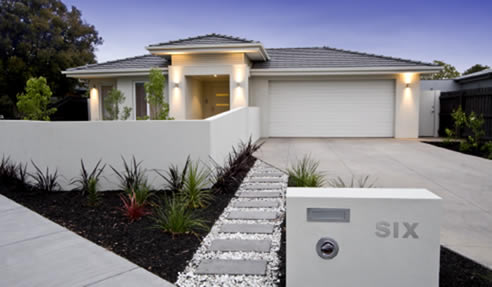 Transforming a home's facade with external rendering adds value and street appeal. Aside from enhancing the appearance of the walls, external rendering also protects the structure from natural elements such as the wind, rain, frost, and sunshine. It also keeps the structure well insulated.
Ready to Render? JPS Coatings offer what you need for your rendering application!
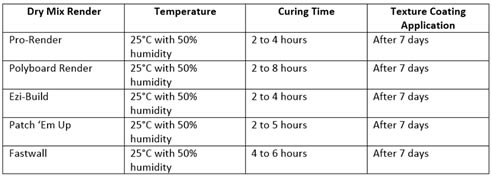
External Rendering Application with Dry Mix Renders from JPS Coatings
1. Prepare the Substrate Wall for External Rendering For new external rendering application, preparing the substrate is much easier. Make sure that the substrate wall is intact, clean, dry, and free from any residue such as oil, powder, dust and bond breakers, which might affect the adhesion of the rendering material.
|
03 9357 6644 19 Jesica Road, Campbellfield, Vic, 3061
|


Related News Articles
 Polyboard Acrylic Modified Render from
 Easy DIY Architectural Finishes from JPS
 PolyBoard Acrylic Modified Render from
 How to Apply Exterior Texture Coatings
 Evolving Elements Water Based Acrylic
 Achieve Sustainability with Cova-Wall
 Self-Priming Acrylic Exterior Paints
 Elastomeric Roof Coating: Evolving
 Evolving Elements Terraglaze Plus+
 Surface Preparation with Evolving
 Freedom to Design with Cova-Wall
 Rendering with Acrylic Polymer Render &
 Applying Evolving Elements Acrylic
 The Benefits of Waterproof Roof Coating
 Evolving Elements Quality Acrylic
 Premium Interior House Paints for a
 Tex Guard Pigmented Acrylic Coating:
 Highly Integrated Professional Roof
 Highly Integrated Professional Roof
 Cova-Wall Certified Polystyrene Cladding
 Cova-Wall Certified Polystyrene Cladding
 Dry Mix and Polymer External Wall
 Dry Mix and Polymer External Wall
 |
 |
Home | About/Services | News Lounge | News Archive | Product Archive | Tender News | Testimonials | Conditions of Use | Privacy Policy | Stats
![]()
![]()
![]()
![]()
© SPEC-NET